 how-to
Diagnosing Car Issues With Visual Proof: A How-To Guide
Table of Contents
- Why Visual Proof Changes Car Diagnosis
- Visual Signs of Car Problems You Can Spot Yourself
- Step-by-Step Visual Inspection With Photo Examples
- What Does a Car Diagnostic Test Show?
- How to Document Car Problems for a Mechanic
- DIY Car Troubleshooting Tools Worth Keeping
- Safety Limits of DIY Visual Diagnosis
- Conclusion
- Frequently Asked Questions
Last Updated: October 19, 2026
Why Visual Proof Changes Car Diagnosis
Visual proof means capturing what you actually see on your vehicle, in photos and notes, before anyone touches a wrench. At SHEA'S AUTOMOTIVE, that evidence starts every diagnosis. A photo of a leaking seal or worn belt beats a vague memory of "something felt off."
A scan tool reads what the computer thinks is wrong. Your eyes catch what it cannot see: cracked hoses, worn pads, low fluid, a tire with a sidewall bubble.
What Counts as Visual Evidence
Visual evidence is any recorded observation you can show another person:
- Photos of leaks, cracks, wear, or damage, close up and in good light
- Written notes with date, mileage, and what you saw
- Short videos of a noise, wobble, or intermittent warning light
The key word is recorded. A memory fades; a photo does not.
Where Scan Tools Stop and Eyes Take Over
An OBD-II scanner reads diagnostic trouble codes from the vehicle's computer, which is genuinely useful. But a misfire code tells you which cylinder is acting up, not why, the cause could be a bad spark plug, failing coil, vacuum leak, or wiring damage. Only an inspection separates those possibilities, which is why we pair every scan with a visual check.
Visual Signs of Car Problems You Can Spot Yourself
Many common failures announce themselves visually long before they cause a breakdown. Check these regularly:
- Fluid spots under the car. Color hints at the source: red or pink for transmission fluid, green or orange for coolant, dark brown for oil.
- Tire condition. Look for uneven wear, bulges, cracks in the sidewall, or shallow tread.
- Worn brake pads. Visible through the wheel spokes on many cars; less than a quarter inch of pad material means it is time to act.
A common mistake is ignoring a small leak because the car still drives fine. Small leaks become big ones, and early detection is almost always cheaper than a repair after a failure.
Step-by-Step Visual Inspection With Photo Examples
Set aside 15 minutes and park on a clean, flat surface. Good light matters more than tools. The goal is images that prove what you found and that a technician can interpret without guessing.
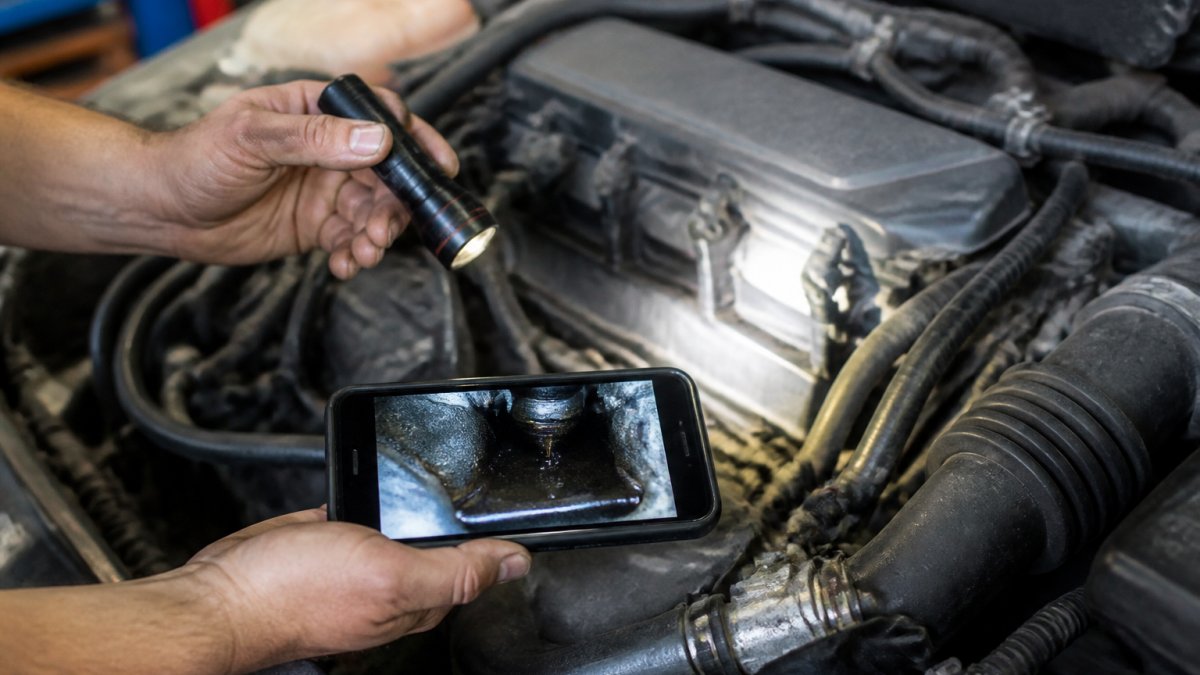
How to Shoot Evidence That Actually Helps
A blurry snapshot of a dark engine bay proves nothing. Set these habits first:
- Fill the frame. A wide shot of the whole engine is a map; a close shot of the leak is the evidence.
- Add a scale reference. Place a coin, ruler, or gloved finger beside a leak, crack, or worn pad so size is unambiguous.
- Use side light, not direct flash. A flashlight held at a low angle reveals cracks, seepage, and glazing that a head-on flash washes out.
Symptom-to-Photo Map
Use this table to connect what you are experiencing to the image worth capturing and the likely cause a technician will check.
| Symptom You Notice | What to Photograph | What the Image Usually Points To |
|---|---|---|
| Fluid spot on the ground | The spot with a coin beside it, plus the area directly above it underneath the car | Color and location narrow the system: red/pink = transmission, green/orange = coolant, dark brown/black = engine oil, clear = water from A/C |
| Sweet smell, low coolant | The coolant reservoir level, the radiator cap area, and hose ends | Seeping hose clamps, a cracked reservoir, or a failing water pump weep hole |
| Squeal on start-up | The belt surface and pulley faces, lit from the side | Glazed, cracked, or frayed serpentine belt; misaligned pulley |
| Rough idle or misfire | Spark plug wells and coil packs (if accessible), plus any cracked vacuum hose | Oil-fouled plug, cracked coil boot, or a split vacuum line |
| Brake squeal or soft pedal | Pad thickness through the wheel spokes, rotor face, and brake fluid level | Pad under about a quarter inch, scored rotor, or low/dark fluid |
| Tire vibration | Tread face, sidewall, and any bulge or nail, with a pressure gauge reading in frame | Irregular wear, sidewall bubble, or embedded object |
| Dashboard light on | The exact symbol while lit, plus the odometer | Which system the computer flagged; odometer ties the event to mileage |
| Corrosion or no-start | Battery terminals, ground strap, and cable ends | White or blue-green crust, loose clamp, or swollen cable |
Exterior and Underhood Checks
- Walk the perimeter. Look for dents, misaligned panels, or a sagging bumper. Photograph anything new with a landmark (wheel arch, door handle) so the location is obvious.
- Check the ground. Note wet spots and their position relative to the engine, transmission, or rear axle. Photograph the spot with a coin, then straight up to the component above.
- Open the hood, engine cold. Photograph the whole bay as a reference frame, then zoom in on anything off.
- Inspect belts and hoses. Look for glazing, fraying, cracks, or soft spots. Rake a flashlight across the belt ribs, cracks show as dark lines a direct flash hides.
- Check the battery. Look for corrosion, a loose clamp, or a cracked case. Photograph the terminal and the date sticker.
- Look for fluid residue. Oily grime around a seal or gasket is visual proof of a slow leak. Photograph the seam itself, not just the grime.
Fluid, Tire, and Warning Light Checks
- Check fluids with the engine cold. Oil, coolant, brake fluid, and washer fluid all have clear high and low marks. Photograph the dipstick against a white paper towel so color and level read clearly.
- Examine all four tires. Run your hand along the tread for uneven wear. Photograph any nail, bulge, or crack with a tread-depth gauge or coin in frame.
- Turn the key to accessory mode. Photograph every warning light that stays on after the bulb-check phase.
- Test the lights. Have someone watch while you work the brakes, turn signals, and hazards. A short video beats a still here.
What a Photo Can and Cannot Prove
A photo is strong evidence of condition, a cracked belt is cracked, a bulging sidewall is bulging. It is weak evidence of cause. A wet spot proves fluid is escaping; it does not prove which seal failed. A corroded terminal proves corrosion exists; it does not prove the corrosion is why the car will not start. Treat images as the start of a diagnosis, not the verdict.
What Does a Car Diagnostic Test Show?
A car diagnostic test shows the fault codes stored by the vehicle's computer plus live sensor data. It reveals which system is misbehaving and what the sensors read in real time, but not which physical part has failed. A good diagnostic combines:
- Fault codes from the OBD port
- Live data, sensor readings and operating values as the engine runs
- A visual inspection that confirms or rules out physical causes
The scan narrows the field; the inspection finds the failed component. Skip either one and you are guessing.
How to Document Car Problems for a Mechanic
Good documentation gets you a faster, more accurate repair and protects you if a repair is ever questioned. The difference between a useful record and a useless one is knowing what to capture and how to package it.
Build the Record
Keep a simple log with these fields for every symptom:
| What to Record | Why It Matters |
|---|---|
| Date and mileage | Shows when the symptom started and ties it to service intervals |
| Photo of the issue | Proves what you saw, not what you recall |
| When it happens | Cold start, braking, highway speed, turning, narrows the system |
| Warning lights | Exact symbol and whether it stays on after the bulb check |
| Any recent repairs | Rules out related causes and workmanship questions |
| Fluid levels and colors | Narrows the system involved |
| Ambient conditions | Temperature, weather, and whether the engine was hot or cold |
Photo Angles and Lighting That Hold Up
A technician can work with almost any clear image, but a few conventions make your photos far more useful:
- Three-shot rule. Take a wide shot showing where on the vehicle you are, a medium shot of the component, and a close-up of the defect. The wide shot is the map; the close-up is the evidence.
- Rake the light. Hold a flashlight at a low angle across the surface. Raking light reveals cracks, seepage, and glazing a direct flash flattens out.
- Include a scale. A coin, ruler, or gloved finger beside a leak, crack, or worn pad turns "it's dripping" into a measurement.
What Not to Conclude From an Image
Photos prove condition, not cause. A wet spot proves fluid is escaping, not which seal failed. A corroded terminal proves corrosion exists, not that it is why the car will not start. A worn pad proves wear, not that the rotor is within spec. State what you observed and let the technician connect it to a confirmed failed part through testing.
Packaging Evidence for a Warranty or Repair Claim
If a repair may be covered by a warranty, extended service contract, or insurance claim, the record becomes part of the claim file. A few practices make it hold up:
- Keep the originals. Keep the unedited file with its metadata alongside any marked-up copy.
- Write a one-paragraph summary. Date, mileage, symptom, what you photographed, and what you did not touch, easier for an adjuster than a folder of images.
- Note what you did not do. If you did not clear codes, add fluid, or drive the car after the symptom appeared, say so. That protects the diagnostic history.
Bring this package to your appointment. A shop that asks to see your photos and walks you through the findings is showing you its process. We do this on every visit because clear evidence builds trust both ways.
DIY Car Troubleshooting Tools Worth Keeping
You do not need a full shop to gather useful visual proof. A few affordable tools cover most of it:
- A bright LED flashlight or headlamp. Hands-free light is the single biggest upgrade.
- A smartphone with a good camera. Use it for every check.
- A basic OBD-II scanner. Inexpensive readers pull fault codes from the OBD port.
Spend a little more on the scanner: a basic reader gives you codes, but a better one shows live data, which is far more useful for fault isolation.
Safety Limits of DIY Visual Diagnosis
Know where to stop. Some checks are safe for anyone. Others belong in a shop with a lift and a trained technician.
Safe for DIY:
- Fluid level and color checks with the engine cold
- Tire inspection and pressure checks
- Light bulb and fuse checks
Not safe for DIY:
- Working under a car supported only by a jack
- Touching wiring, the battery, or anything electrical while the engine runs
- Opening the cooling system while hot
Modern vehicles run complex electronics. A wiring fault or sensor calibration issue needs proper electrical testing, sometimes with an oscilloscope, not a driveway job. Pushing past these limits risks injury and can make a small problem worse.
Conclusion
Diagnosing car issues with visual proof comes down to one habit: capture what you see before you guess. Photos, notes, and a careful walk-around turn vague symptoms into evidence a technician can use.
When the evidence points beyond a driveway check, bring it to a shop that shows you the proof. SHEA'S AUTOMOTIVE is a family-owned shop with ASE-certified technicians and a Certified Auto Repair affiliation.
Frequently Asked Questions
Can a photo or video prove what is wrong with a car?
A photo or video can document visible evidence like a cracked hose, worn brake pad, or fluid stain, but it cannot confirm a root cause on its own. Images work best when paired with a scan tool reading and a technician's inspection. Save clear, well-lit shots and note the date, mileage, and conditions when the issue appeared. A professional can then verify the finding with mechanical or electrical testing before recommending repairs.
What visual signs can help identify a car problem?
Common visual signs of car problems include fluid puddles under the vehicle, uneven tire wear, cracked belts or hoses, dashboard warning lights, exhaust smoke color, and loose or damaged components under the hood. Check these during a routine walkaround with a flashlight and your phone camera. Document anything unusual with a photo and note when it started. A technician can confirm whether the sign points to a minor fix or a larger failure.
How can I document a car issue for a mechanic?
Take clear photos and short videos of the issue, including wide shots and close-ups. Record the date, mileage, and conditions when it happens, such as cold starts or highway driving. Save any warning light images and note sounds or smells. Bring this evidence to your appointment. A shop like SHEA'S AUTOMOTIVE can use your documentation to speed up fault isolation and walk you through confirmed findings before any repair is approved.
When should I stop driving and get a professional diagnosis?
Stop driving if you see smoke, smell burning, notice a red warning light, feel brake or steering changes, or spot a major fluid leak. These signs can point to safety-critical failures that visual proof alone cannot resolve. Have the vehicle towed or inspected before driving further. A professional diagnosis with a scan tool and mechanical inspection will confirm the root cause and help you avoid costly damage or a breakdown.